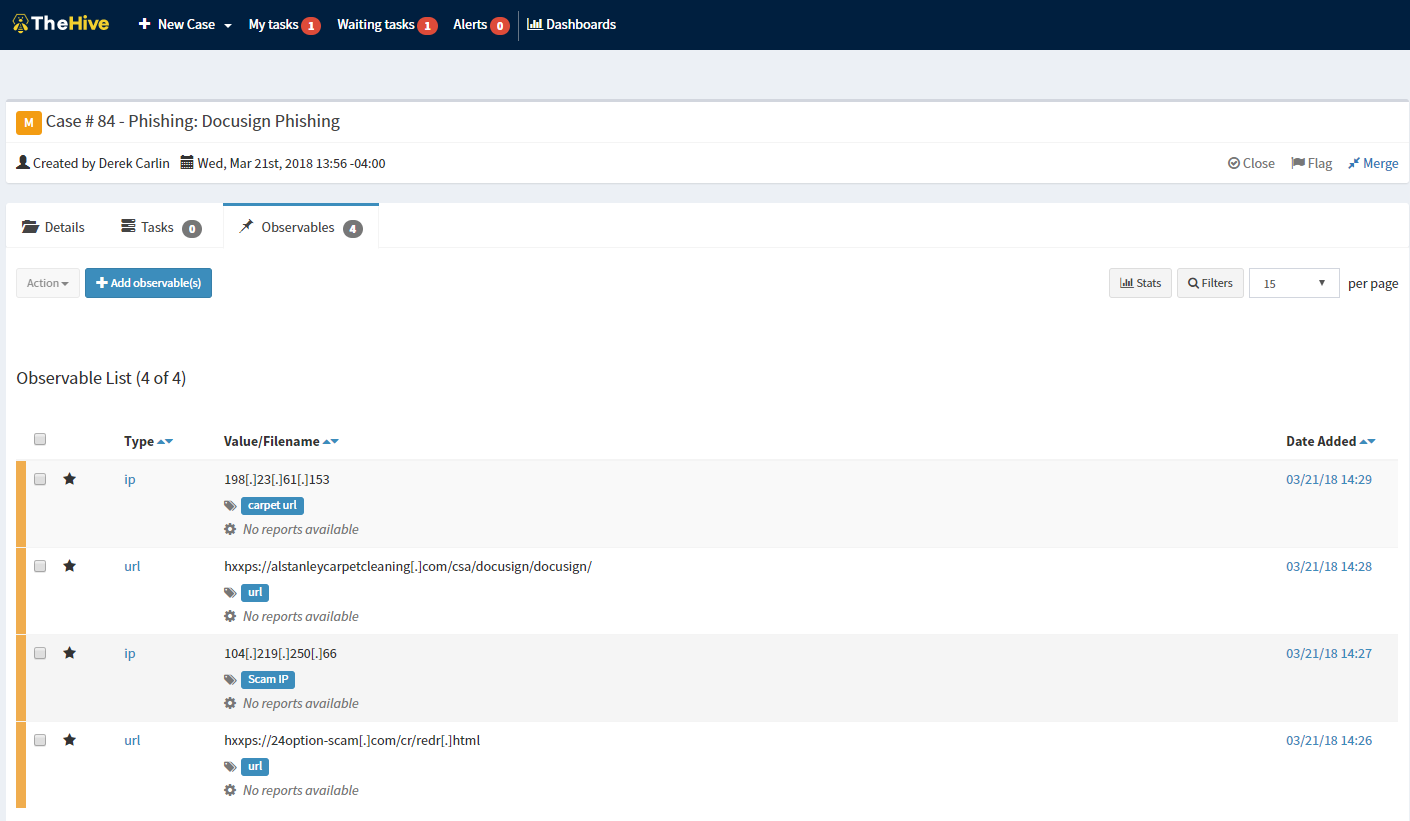
An alert for a phishing email is received where a user clicked a link! Joy. This is how I, and most other analysts like me, start their days. Usually with some measure of fire, and an equal degree of uncertainty as to the scope of impact. Phishing emails are fairly straight forward for the most part though, lets dive in and start the analysis and remediation process.
To Do:
- Query for a list of users who received this email and alert them to it, advise them not to click on any links or download any attachments.
- Retrieve a sample of the email for further analysis.
- If possible, quarantine the emails from the users inboxes once a sample is obtained. (Or delete, I recommend quarantine incase the alert is a false positive).
- If the alert gives you a hash value for any files contained in the message, immediately blacklist them.
- Speak with users who clicked on the link or downloaded the attachment in order to determine the actions they took (entered credentials, etc.)
- Analyze the sample to determine fallout and remediation actions.
- Carry out remediation.
Once steps one through five have been carried out we can begin analysis.
Analysis
Let see what we’re dealing with. Note that the names contained in this email have been changed to protect the innocent! (We will go through the email headers later, don’t worry).
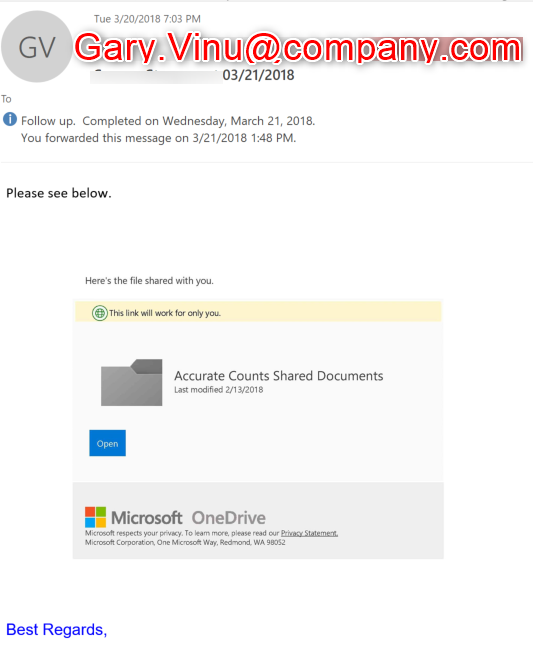
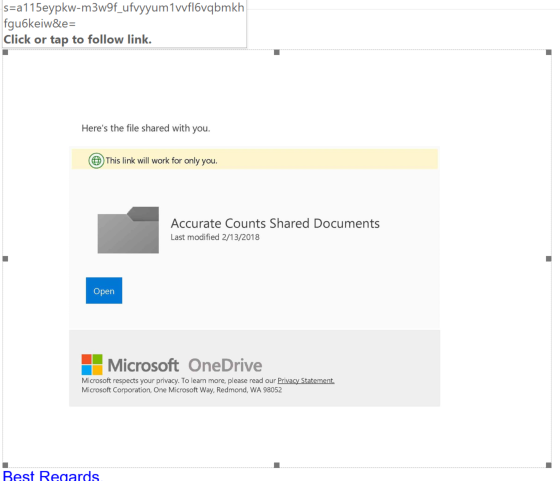
Before the sender’s name was changed to protect his identity, it was determined that this email came from a business contact that was trusted as legitimate. Although after glancing at this email, I’m not so sure. Maybe it was the alert, maybe it is just the pessimist in me, but something doesn’t feel right. If we hover over this clickable link, we can see it’s actually a picture with a link embedded. Nothing strange about that… no sir… Just your standard embedded link One Drive picture?
If we copy the link and analyze it with URLquery we can immediately see that something is off. First things first. The URL doesn’t reflect a Microsoft Domain, it’s actually… well, don’t let me spoil it for you. You can see for yourself, I got a hearty laugh out of it. Clearly OPSEC wasn’t in their bag of tricks.
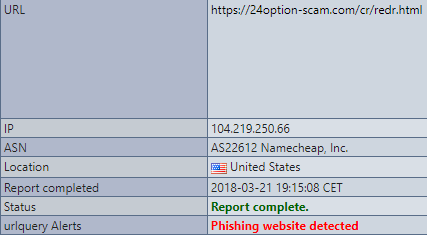
It’s a redirect link however, so this isn’t the landing page. But for now lets record the URL and the IP address and note that for later. Lets see where it redirects to.
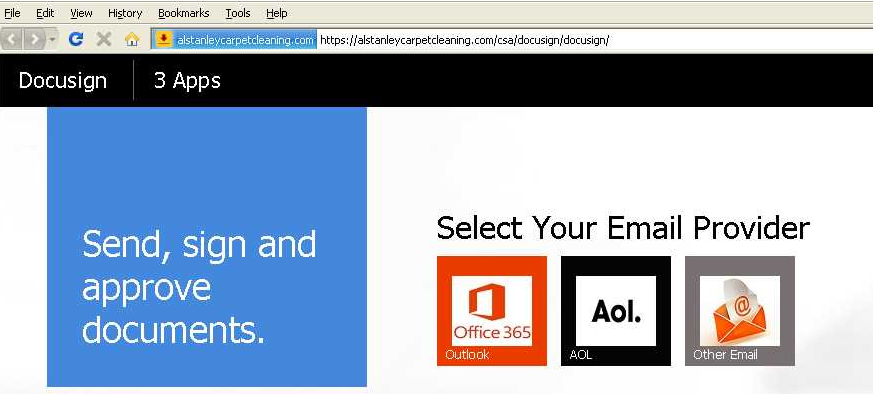
Well this looks completely legitimate. I can sign in with Office 365 OR AOL? What are the chances! But what am I signing in for? The email said that it was for a document on Microsoft One Drive, but this says DocuSign. Nothing strange about that though, seems legit. We should note this new URL and IP Address as well.

So by now as I’m sure you’ve realized, we’re dealing with an actual phishing campaign and not a false positive. So lets ensure these emails are ripped from our users mailboxes and make sure that no one else has landed on these pages (firewall logs are a good place to start that triage). Then contact anyone directly who visited the page, and ensure that they did not enter in any credentials. If anyone has entered their credentials, we follow the same remediation steps as in my last post. Force change the users password and force logout on all devices, then give them their new password out of band. Finally search for suspicious access attempts on their account in the time between entering their credentials and triage time.
We didn’t see any alerts on URLquery to indicate that these pages had embedded malware. But we’re analysts, so we like to be thorough, so lets double check on Virus Total to be sure. I’ll spare you another screenshot, you’ll just have to take my word that it came up clean there also. We could go further down the rabbit hole to prove that there was no malware on this site, but given the scope of the site it’s unlikely that anything was dropped that AV / Next Gen AV wouldn’t flag, so we’ll skip that part for this post.
So what’s left to do? If you remember from early in the post I mentioned that we would analyze the headers in the email itself. So lets do it! We are investigating a couple of items in the headers, as listed below.
- The sender email address
- The return path of the email
- The IP Address of the email server used to send the message
- The name server name of the sending server.
The results can be compared with online records to determine the email came from a companys registered mail server (in this case it was a vendor who was compromised, and the mail server details in the headers confirmed this) or from a third party.
Now what?
Lets review the data that we’ve now collected.
- IP addresses of the original site, and the redirect.
- URLs of both theses sites.
- Sender email address.
- Sender mail server IP.
- Sender mail server name.
So what do we do with all this data? The answer depends on the use case. The data can be added to a threat intelligence platform and fed into sensors to alert if any other messages come in from this sender / mail server, or if anyone contacts these URLs or IP Addresses. Or these IP’s and URLs can be temporarily blacklisted. The final recommendation is to write up the case details and add them to an Incident Response case on various platforms. The one I use is called The Hive Project, which can be found
